How to Put Text in an Arc Using GIMP

For my recent snowman idea, I was thinking of having the words “Happy Holidays” appear arched over the head. I decided against it in the end, but I learned the process involved in getting it done in GIMP nonetheless, as well as a couple of mistakes to avoid.

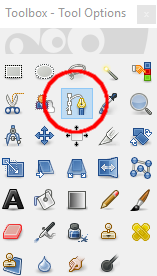
1. Use the Path tool.

The other sources I found said to get the path first, but the order doesn’t matter so much as making sure you have the right path or layer highlighted for what you’re doing. In any case, that’s where we’ll start for our example.

The path tool:
2. Make the arc.

For the purpose of our example, click on the left lower end of where you want the arc to start and then click on the right lower end of where you want the arc to end. You should have a straight line, or at least straight-ish. Then place the mouse at the middle of where the arc is going to rise. Click and drag the path upward. We now have an arc. You can fiddle with it more in other ways if it’s not quite what you want.


3. Make the text path.

Now that we have our path, I suggest naming it. I named mine, “ArcExample.” Make sure this path stays or is selected in the paths dialog for this next part. Add the desired text and keep it as a separate text layer. Right-click the text layer and select, “Text along path”. Alternatively, you can highlight the text, right-click it there, and pick “Text along path.”

Warning: Don’t make the text too big.

I kept having this problem in my own process and eventually realized it was because the font I chose was too big so take note to avoid that.


When you do have the text at a suitable size, a new path outlining the full text on the arc we made earlier appears.

4. Select the text path.

Go to the paths dialog, find the one just created, name it if desired, and right-click, then pick Path to Selection.


5. Fill the text color.

Fill it up with the desired color.


DONE!

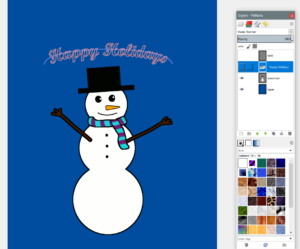
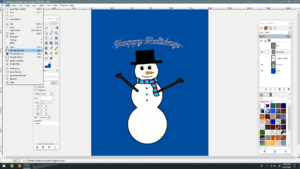
Deselect, hide path, and it’s done:

Sources:
VisiHow: Write Text in an Arc in the GIMP App
Techwalla: How to Curve Text in GIMP
YouTube: How To Warp Text With GIMP
Superuser.com: Change style and color of text with text along path (gimp)
How to Use Twitch Leecher for Single Video Downloads

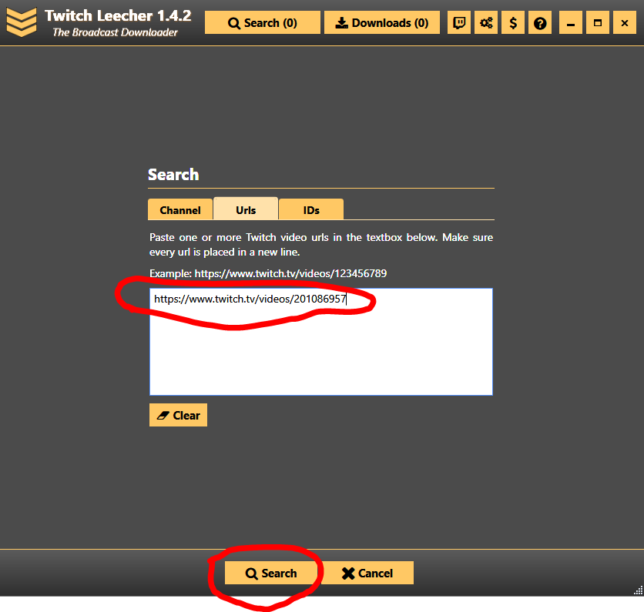
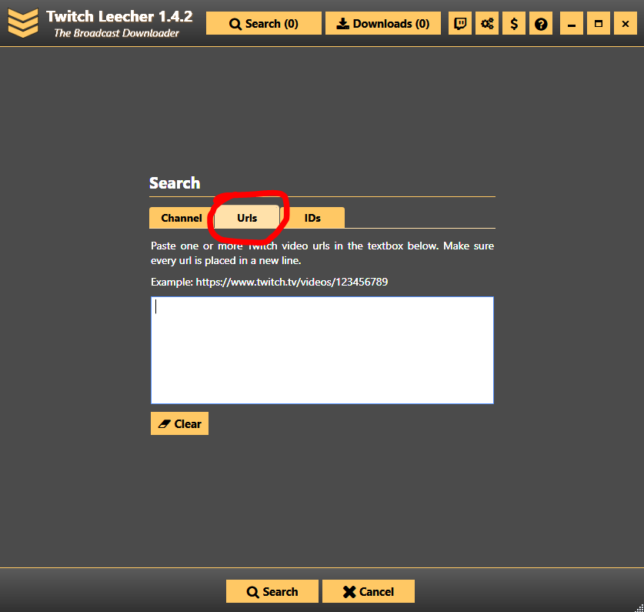
While working on my Highlights of Qudans Winning Tekken World Tour 2017 video, I searched for a way to download videos from Twitch and found a program called Twitch Leecher, and the recommendation from its use on Lifewire, here: How to Download Twitch VOD Videos. It was extremely useful, so I’d like to share the main that part helped me along with some pictures in case that helps someone else. The version I am using for at the time of this post is 1.4.2. After the program is downloaded, open it up and click the Search button on the top menu. Go to the Urls tab.

Copy/paste the URL of the desired video(s) and then click Search from the buttons on the bottom.

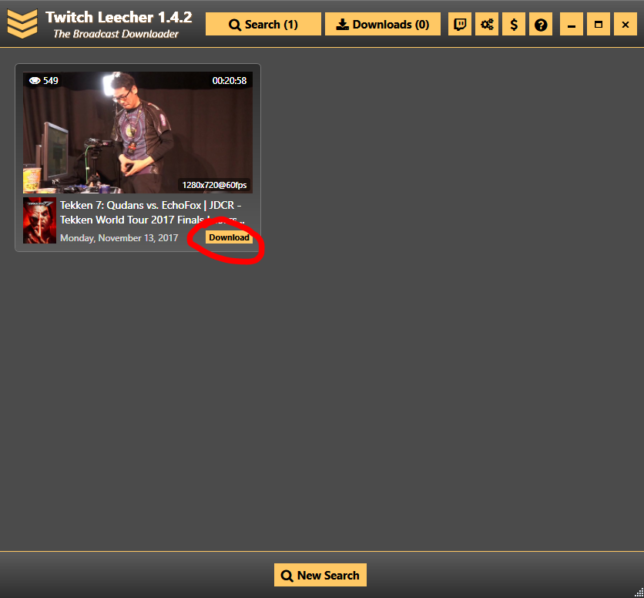
A loading screen will appear and then a thumbnail of the video to be downloaded with a button to do that.

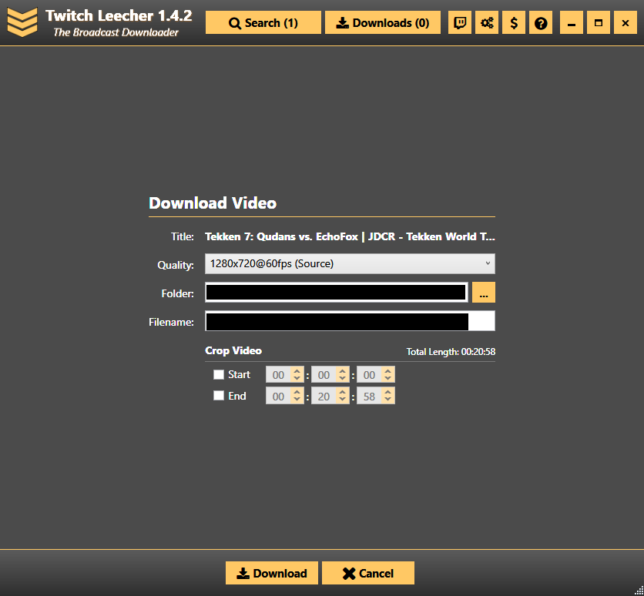
Click the download button, and then you can enter your file information, such as quality, destination, file name, etc.

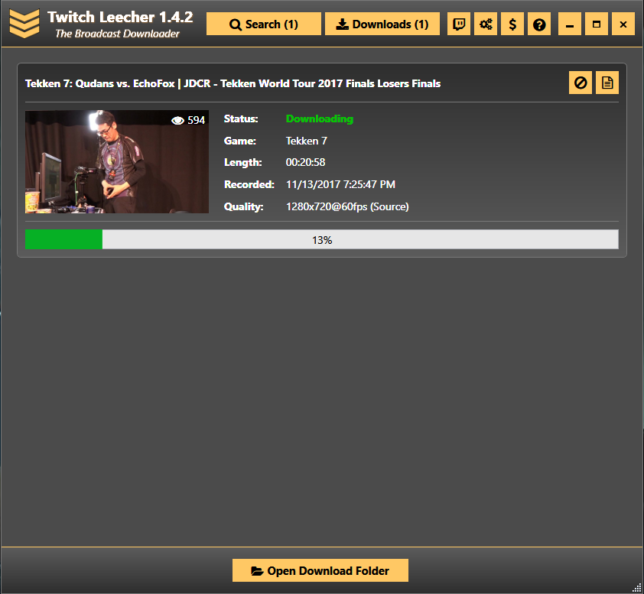
Click download, and it will be added. You can switch on over to see the Download, using the Downloads button in the top button set. You will see download information and a progress bar, along with a button at the bottom to open the download folder.

That is the gist of what I needed. I could have done more than one at a time, but I was getting a feel for how to use the program first. It’s good to know for possible future projects.

How to Reduce Noise in Audacity

How to Reduce Noise in Audacity

The below post was originally written in January 2013 for my Tumblr and has been copied and back-dated here to match that.

Yesterday, I worked on a video talking about the video games I played in 2012. While doing my voice recordings, I seemed to be picking up more static noise than usual. Maybe I did the last time I did a recording too and was simply used to it. It had been months since my TTT2 review.

In any case, it bothered me enough to see if there was something I could do about it, and there was.

Here’s how, as noted on the Audacity wiki:

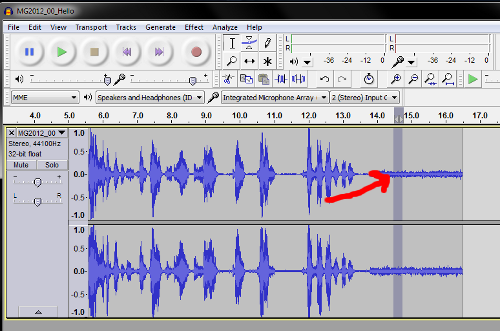
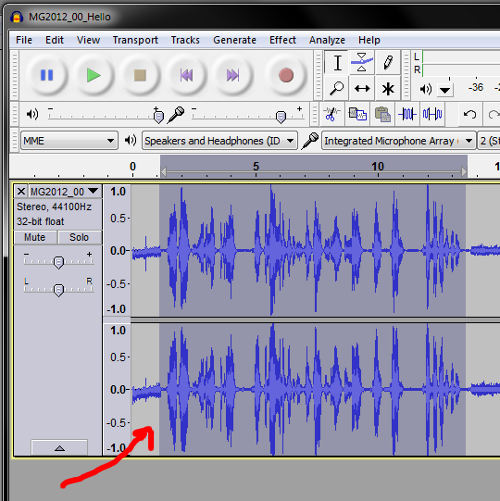
-Find a portion of the recording that is ONLY the noise you want to remove. I usually have a few seconds of lead-in and lead-out time when I make my recordings, so that part’s simple enough.

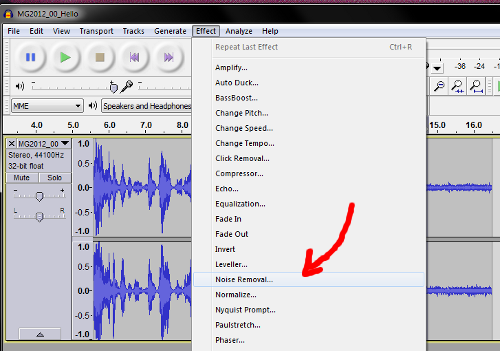
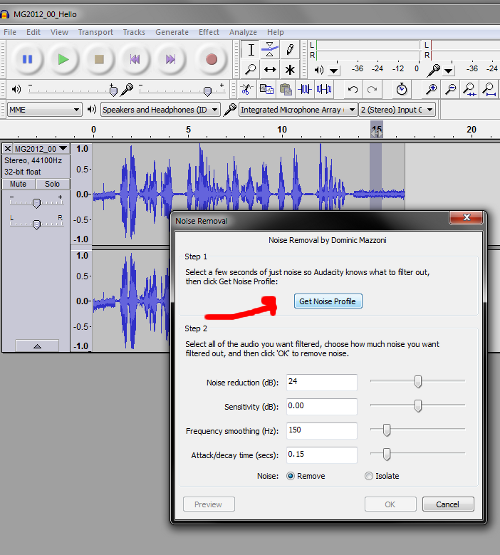
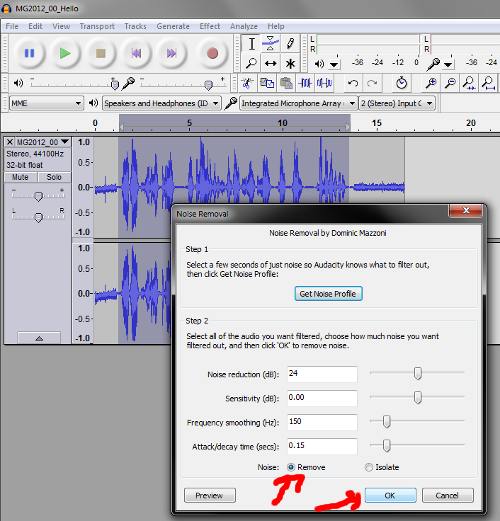
-Go to Effect -> Noise Removal and click on the button that says “Get Noise Profile.”

-Now select the portion of audio from which you want to remove that noise. For me, that’s the part between my lead-in and lead-out parts.

-Go to Effect -> Noise Removal again but this time check that the “Remove” radio button is selected and then click on the “OK” button.

And there it is. The link above has some more tips to improve it in case you are not satisfied. For me, it was enough for the most part. It sounded just fine from my laptop’s speaker and only had a hint of static with my speaking when I was wearing headphones. Nobody commented on it being an issue on the video. I have a few views and a couple of likes so can only assume it’s either not a problem or not a big, noticeable problem.

UPDATE January 2018: The “Audacity wiki” text originally linked to a specific wiki page. I have removed it because the page is gone and am leaving the original text of my tutorial intact. The last image used in this post shows “Remove” selected, but as of this typing, the menus look a little different and instead use the wording “Reduce.”